Getting Started
What is this?
Star Fleet Battles is a counters on a map game with pages and pages of rules.
The Cadet Training Handbook is an introduction to that system where each scenario introduces
a few rules and builds upon previous scenarios to gradually teach you the game.
This is a JavaScript application where you can play out these scenarios
in your browser.
What do I need to play this?
 SBF Cadet Training is to be played with the Cadet Training Handbook.
You'll need a copy of the handbook for the rules of the game and the general setup and goal of each scenario.
You can download a free pdf of the handbook from various vendors. You can find additional information and products for
Star Fleet Battles here.
How do I start?
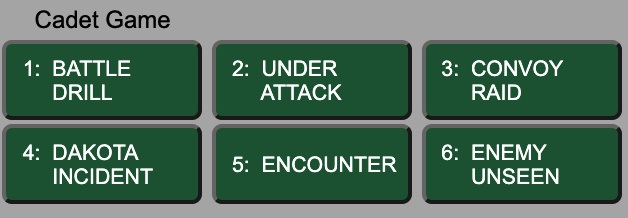 After reading the rules and setup for a scenario from the Handbook, select that scenario.
The Cadet Game (scenarios 1-6) use smaller Cadet ships and utilize fewer ship systems.
The Standard Game (scenarios 7-12) use larger ships and build on what you've already learned by adding more rules and systems.
Give me Options
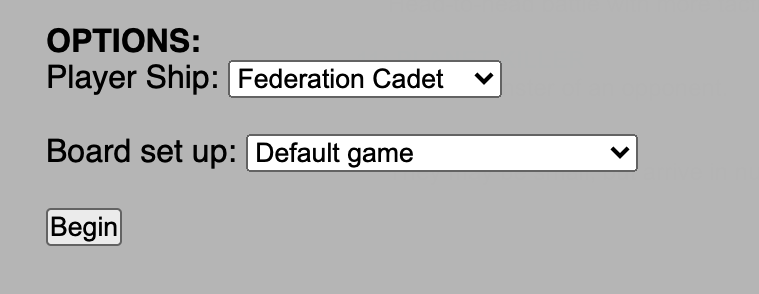 Default settings for each scenario will match the setup in the handbook.
You can alter these with drop-down menus under OPTIONS. The first two scenarios use the Federation Cadet ship
by default. You can choose to use the Klingon or any other available Cadet Ship by selecting it from the drop-down menu.
Other options may be available, such as changing the starting configuration of enemy units, adding to the replayability
of each scenario.
Default settings for each scenario will match the setup in the handbook.
You can alter these with drop-down menus under OPTIONS. The first two scenarios use the Federation Cadet ship
by default. You can choose to use the Klingon or any other available Cadet Ship by selecting it from the drop-down menu.
Other options may be available, such as changing the starting configuration of enemy units, adding to the replayability
of each scenario.
Then what?
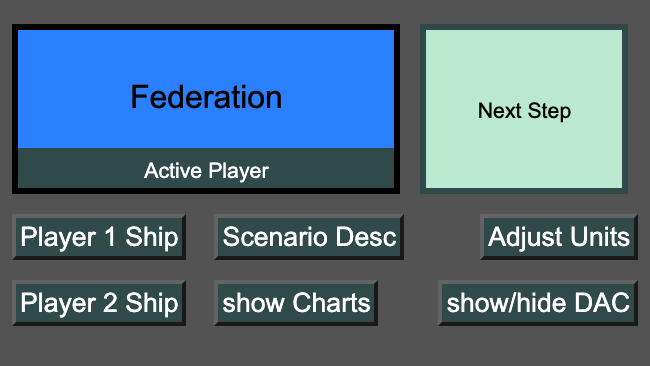 Clicking Next Step will progress the game to the next step or phase. The game will alternate between Player 1 and Player 2.
Their designation will appear in the window at left. The choices that appear in the Control panel above pertain to this player.
When done with each action, click Next Step to continue.
Clicking Next Step will progress the game to the next step or phase. The game will alternate between Player 1 and Player 2.
Their designation will appear in the window at left. The choices that appear in the Control panel above pertain to this player.
When done with each action, click Next Step to continue.
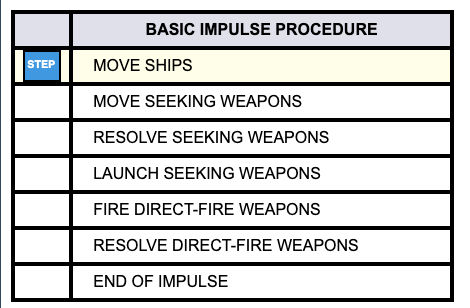
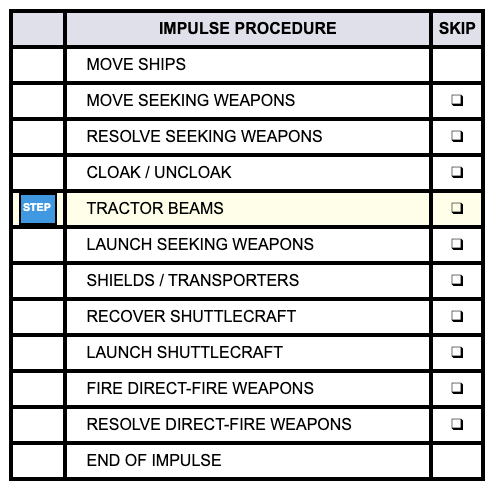
Follow the Sequence of Play
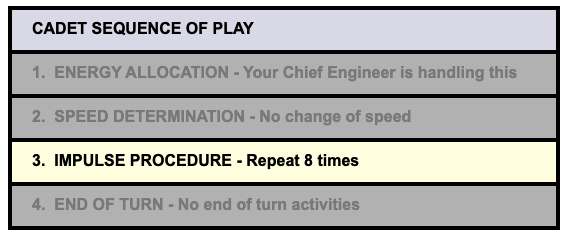
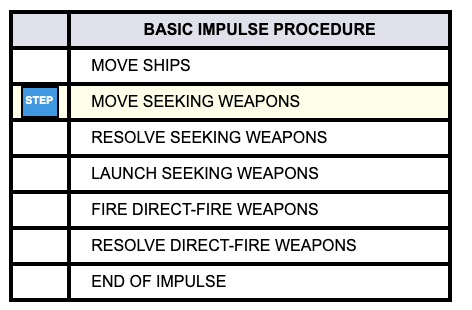
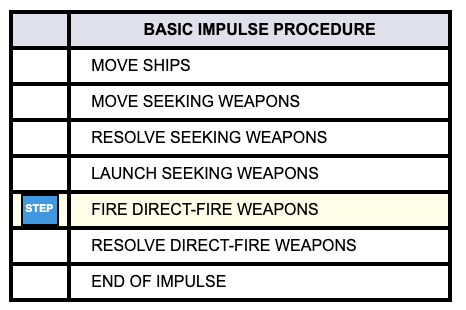
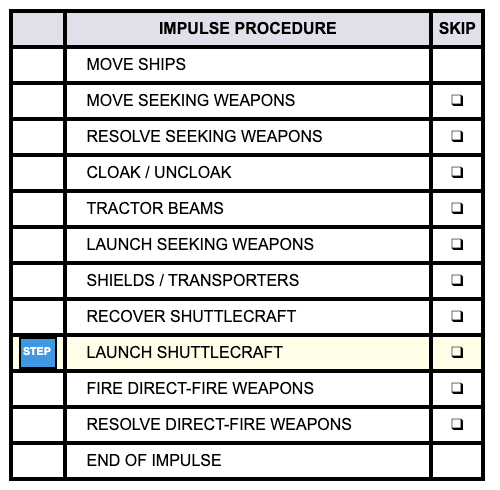
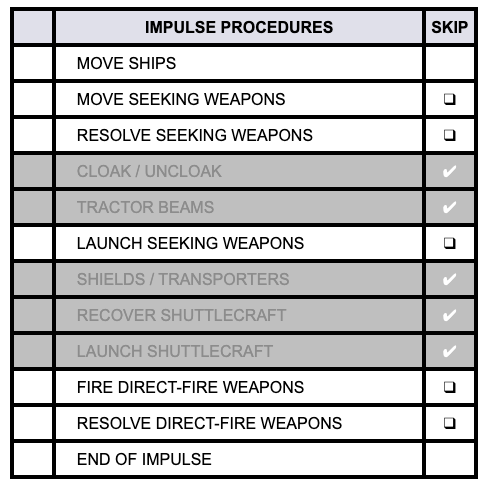
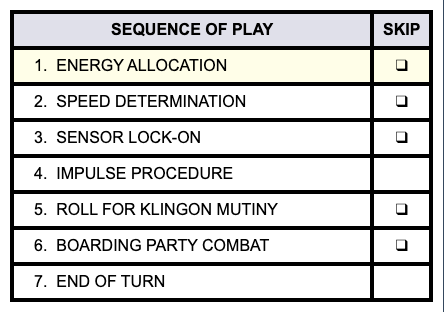
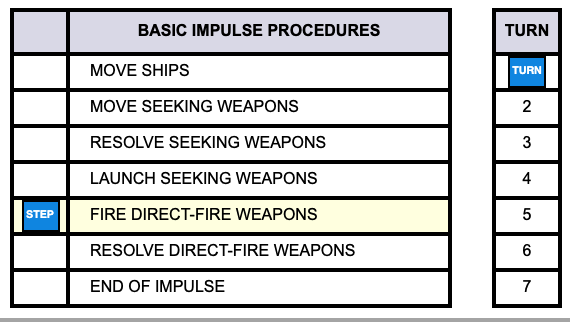 Follow the Sequence of Play displayed on the game charts. Early scenarios focus on movement and firing weapons, activities that
occur during the Impulse Procedure. Later scenarios will add additional steps to both the Sequence of Play and the Impulse Procedure.
Follow the Sequence of Play displayed on the game charts. Early scenarios focus on movement and firing weapons, activities that
occur during the Impulse Procedure. Later scenarios will add additional steps to both the Sequence of Play and the Impulse Procedure.
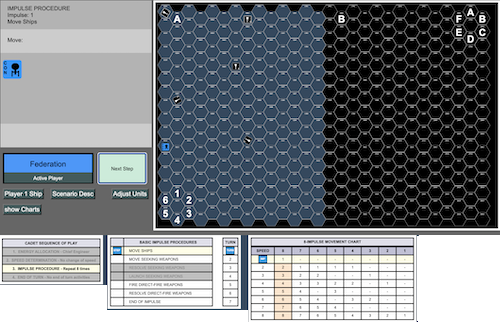
Control Panel
 Most of your interaction with the game take place in the Control panel. The top segment lists the current Sequence, Impluse and Step.
You can see this information here or on the game charts.
Most of your interaction with the game take place in the Control panel. The top segment lists the current Sequence, Impluse and Step.
You can see this information here or on the game charts.
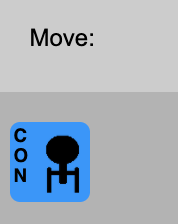
The next segment displays a command such as Move: or Launch Seeking Weapons: to the active player as long as he/she has a valid
unit to take the action. If blank click Next Step to continue.
The largest segment is where the active player answers the command by selecting a unit or an action that unit will take this impulse.
Icons of ships or direction arrows act as button. Click to select that unit or action. A group of checkboxes allow you to select one or more items of an action.
The last segment is the Message panel. Additional information about the action may be displayed here,
such as damage received or unit targeted. It may display a Back button to abort the current action.
If you click a counter on the game map, additional information about that unit will be displayed in the Message panel.
This may include the unit's position, speed, damage, and more.
Other Controls
Below the Next Step button are a number of buttons that
provide access to additional screens and content, such as your Ship System Display(SSD) and DAC. Both are discuses below.
The Adjust Units button gives access to a menu of stats you can alter for each unit on the board, such as postion, facing,
speed and more. Very useful if you missed a move command by clicking Next Step one too many times or if you just want to
alter some aspect of the scenario.
Ship System Disply (SSD)
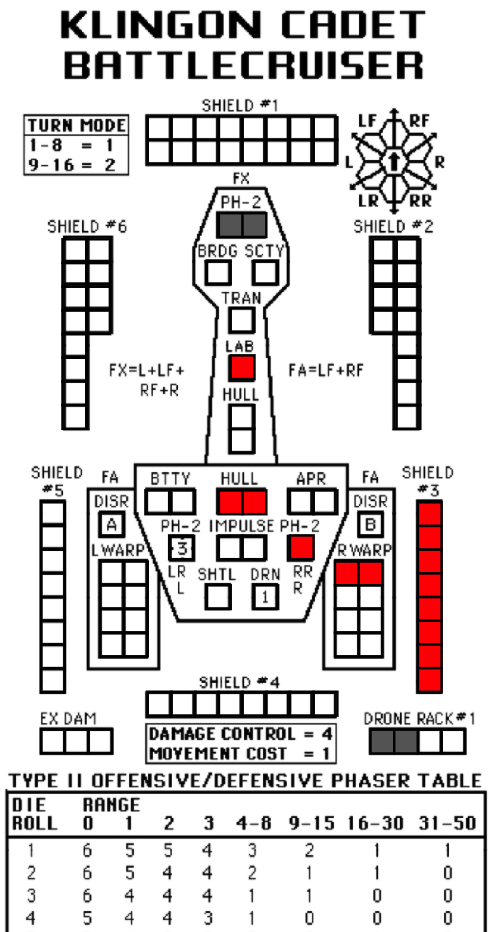
 The Ship System Display (SSD) provides a wealth of information about each starship: shield strength, turn mode,
weapons, firing arcs, range and damage charts and more. SSD boxes can be shaded red or black.
Use one color to mark damage and the other to mark weapons fired this turn. Boxes can be cleared by clicking on them again.
The Ship System Display (SSD) provides a wealth of information about each starship: shield strength, turn mode,
weapons, firing arcs, range and damage charts and more. SSD boxes can be shaded red or black.
Use one color to mark damage and the other to mark weapons fired this turn. Boxes can be cleared by clicking on them again.
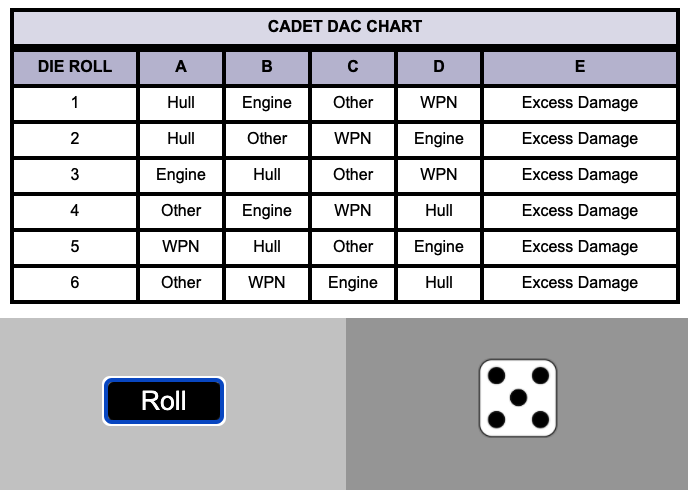
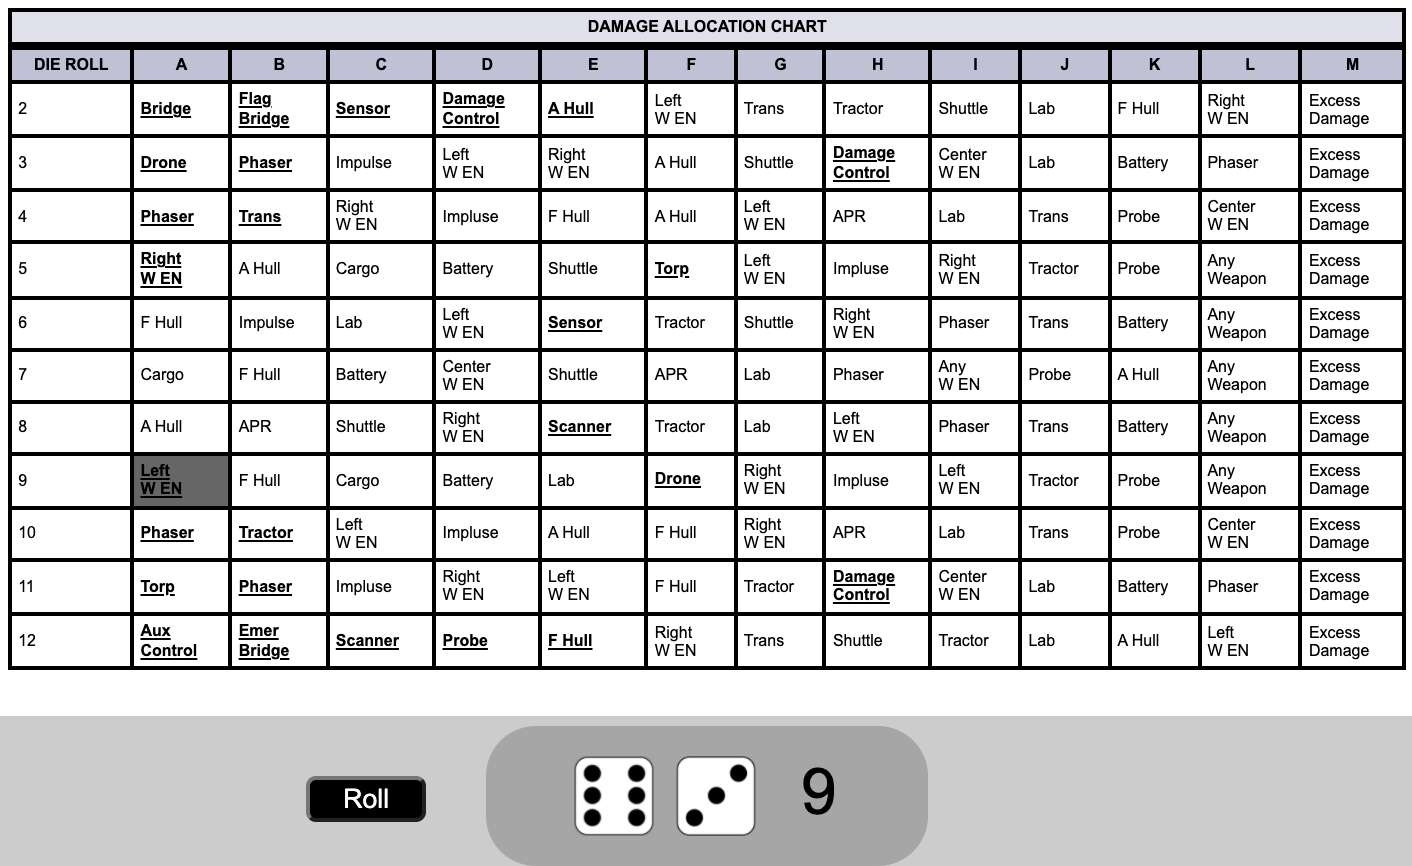
In later scenarios, you will apply damage and mark off boxes as destroyed. Some scenarios will tell you how to apply the damage, others will use a Damage Allocation Chart (DAC).
Below the DAC is a die roller you can use to generate each hit.
The Standard Game DAC, used with scenarios 7-12, has underlined items. These spaces can only be hit once per volley and can be clicked to mark them as hit.
Another click will clear the space for the next round.
Movement and Weapons
Refresh/Reload
This is a JavaScript application running in your browser. If you navigate away, refresh the page or close the window, your progress in the game will be lost. There is no SAVE feature.
If you Refresh/Reload the game page, you will be taken to the Scenario selection screen where you can choose another.
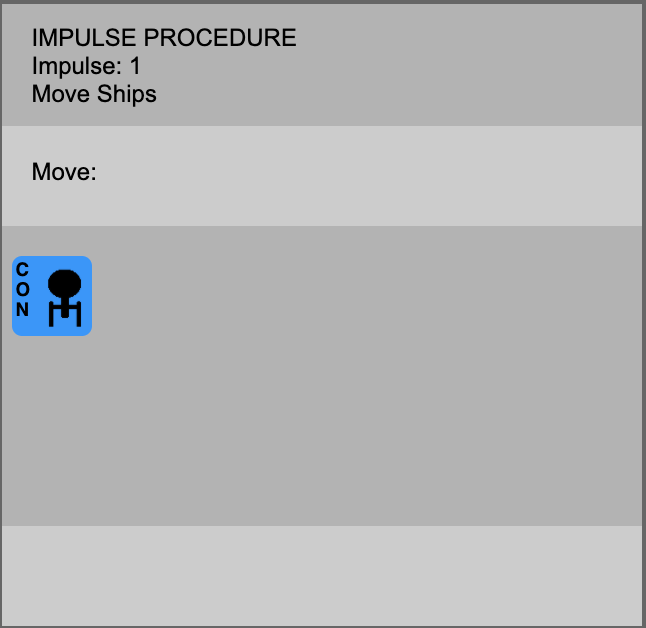
Move Ships
 Ships scheduled to move will appear in the Control panel on the left.
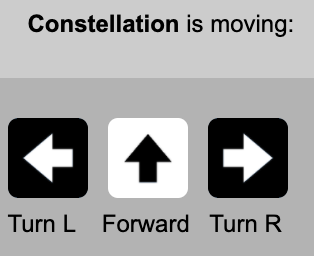
Clicking the ship icon in the Control panel, a set of movement arrows will appear in the
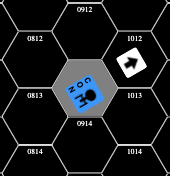
Control panel. As the Forward button always points up, a matching arrow counter will appear on the map indicating
the hex the ship will enter on a Forward order.
Ships scheduled to move will appear in the Control panel on the left.
Clicking the ship icon in the Control panel, a set of movement arrows will appear in the
Control panel. As the Forward button always points up, a matching arrow counter will appear on the map indicating
the hex the ship will enter on a Forward order.
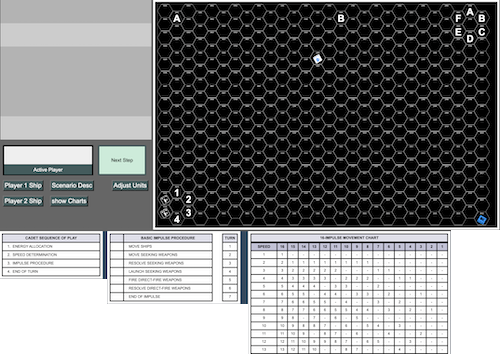
Move Seeking Weapons
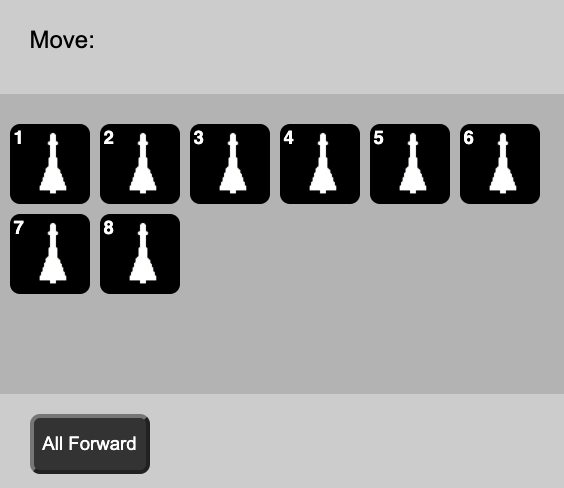 Move Seeking Weapons works just as Move Ships. Sometimes a side has multiple units to order. You can order each unit indivdually, clicking on them one at a time.
Or you can use the All Forward button to move all units Forward this impluse. Since all drones in the first scenario
only move forward, you can make great use of this button. Only units still showing in the Control panel will move when the
All Forward button is clicked. So you can move a few units individually (turning Left or Right), then use the All Forward
on the remaining units.
Move Seeking Weapons works just as Move Ships. Sometimes a side has multiple units to order. You can order each unit indivdually, clicking on them one at a time.
Or you can use the All Forward button to move all units Forward this impluse. Since all drones in the first scenario
only move forward, you can make great use of this button. Only units still showing in the Control panel will move when the
All Forward button is clicked. So you can move a few units individually (turning Left or Right), then use the All Forward
on the remaining units.
Resolve Seeking Weapons
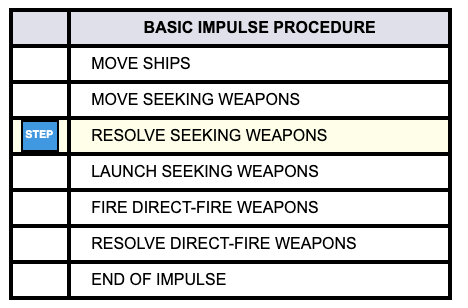

 Resolve damage for any seeking weapon that found its target during the previous movment step.
Click the seeking weapon item displayed in the Control panel to resolve, there may be more than one.
A brief report of damage and shield struck will display in the Message panel. Click each seeking weapon
item in the Control panel to resolve. Click Next Step to continue.
Resolve damage for any seeking weapon that found its target during the previous movment step.
Click the seeking weapon item displayed in the Control panel to resolve, there may be more than one.
A brief report of damage and shield struck will display in the Message panel. Click each seeking weapon
item in the Control panel to resolve. Click Next Step to continue.
Launch Seeking Weapons
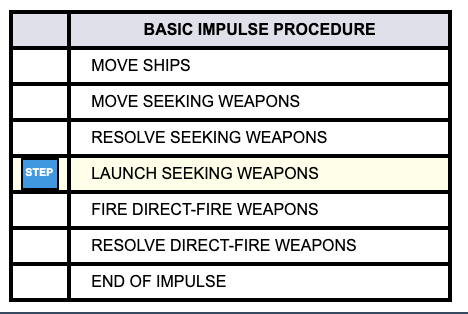
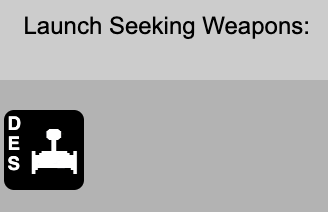
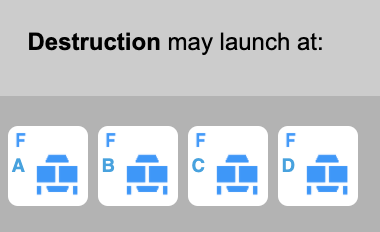
 Active ships capable of launching drones or torpedoes will appear in the Control panel.
Choose a ship by clicking its icon. A set of eligible targets will appear in the Control panel. Click the target icon to proceed.
Active ships capable of launching drones or torpedoes will appear in the Control panel.
Choose a ship by clicking its icon. A set of eligible targets will appear in the Control panel. Click the target icon to proceed.
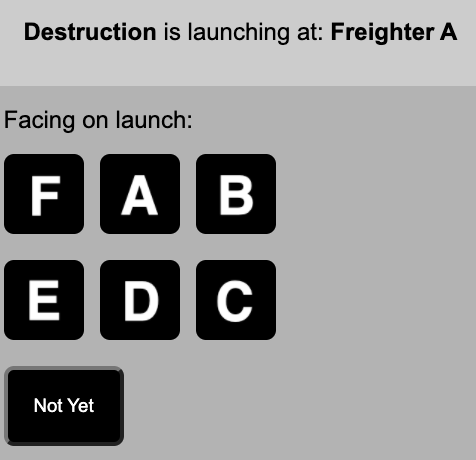
After selecting a target, you'll choose the direction to point the drone or torpedo on launch.
Click Not Yet to abort. You will be taken back to the initial step where you can choose to launch again or choose to launch from another ship.
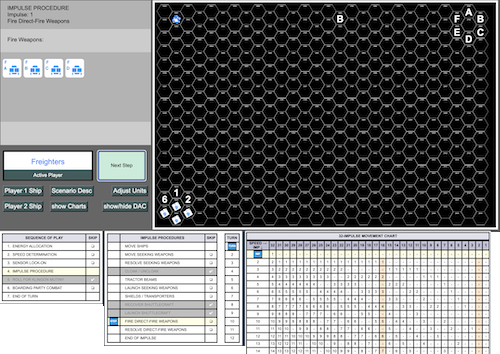
Direct Fire Weapons
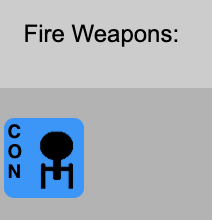
 Active ships will appear in the Control panel. Click a ship icon to have it fire this impluse.
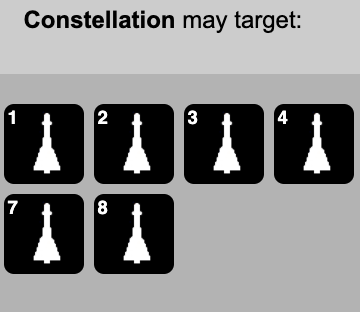
A set of eligible targets will appear in the Control panel. Hovering over each will give the range. Click the target icon to proceed.
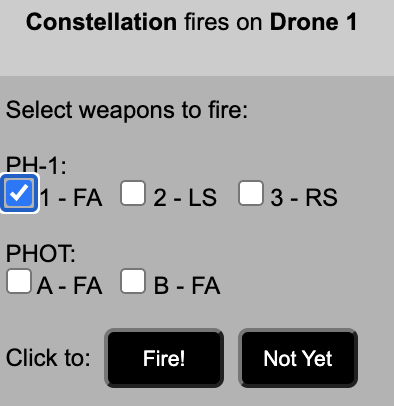
After selecting a target, a set of checkboxes showing the ship's direct-fire weapons appears. The boxes are grouped by type and display their firing arcs.
Select all that you wish to fire at this target on this impluse.
Click Not Yet to abort or Fire to confirm. You will be taken back to the initial step where you can choose to fire again at another target or from another ship.
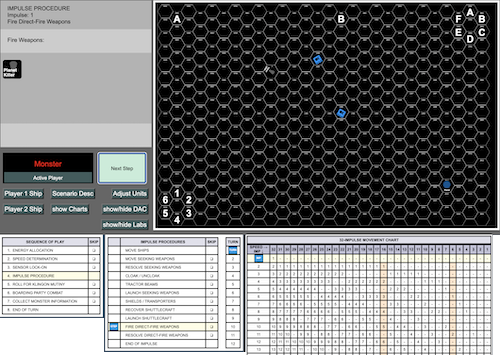
Direct Fire Resolution

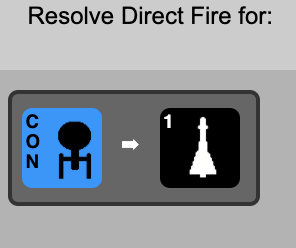
 Resolve weapons fired in the previous step. Click on an Attack-Target pairing, there may be more that one.
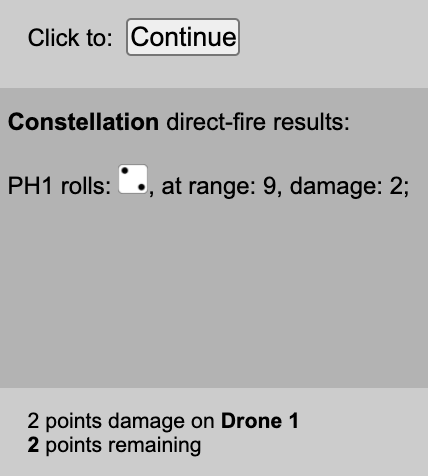
The game will roll a die and calculate the resulting damage for each weapon fired. A report of this will display in the
Control panel and a damage total in the Message panel. If you have more that one attack to resolve,
be sure to click the Continue button to return to select the next Attack-Target pairing. Otherwise,
click Next Step to continue.
Resolve weapons fired in the previous step. Click on an Attack-Target pairing, there may be more that one.
The game will roll a die and calculate the resulting damage for each weapon fired. A report of this will display in the
Control panel and a damage total in the Message panel. If you have more that one attack to resolve,
be sure to click the Continue button to return to select the next Attack-Target pairing. Otherwise,
click Next Step to continue.
Energy Allocation Form (EAF)
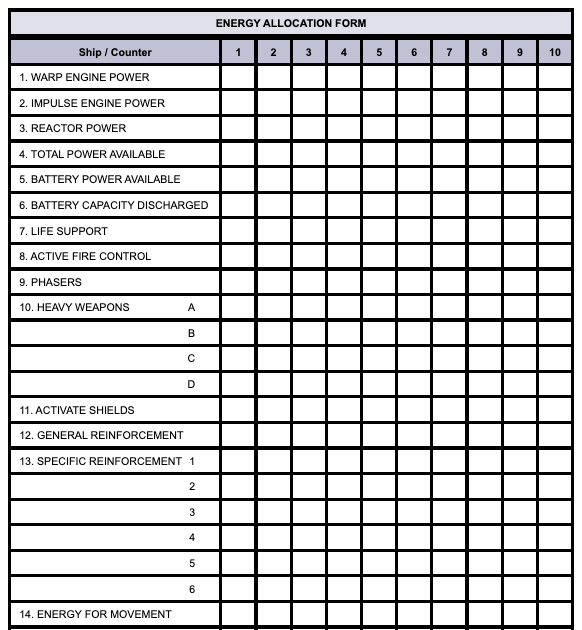
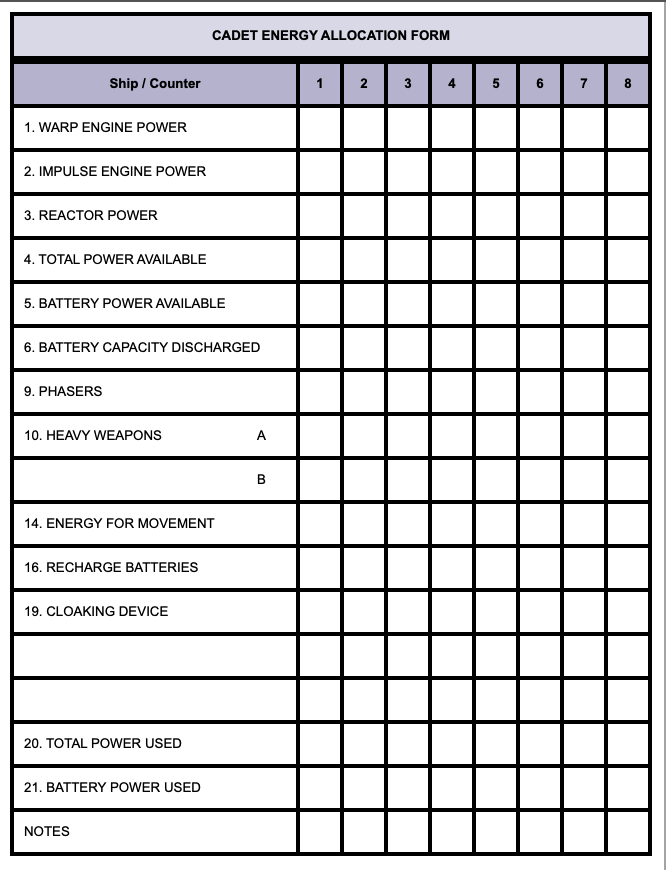 Durning the first three scenarios, your Chief Engineer takes care of all your power needs.
Later scenarios will have you fill out the Engergy Allocation Form each turn.
Allocating this limited resource is an important part of Star Fleet Battles.
The Cadet games asks you to fill out a scaled-back version of the EAF.
Durning the first three scenarios, your Chief Engineer takes care of all your power needs.
Later scenarios will have you fill out the Engergy Allocation Form each turn.
Allocating this limited resource is an important part of Star Fleet Battles.
The Cadet games asks you to fill out a scaled-back version of the EAF.
Scenarios 5 & 6 allow you to play as either side in some head-to-head matches.
If playing solo, you can choose to play both sides, filling out both EAFs.
Or you could use the Cadet Robot rules found in the Handbook for one side and
fill out an EAF only for the side you will pilot.
Additional Ship Systems
Cloak/Uncloak
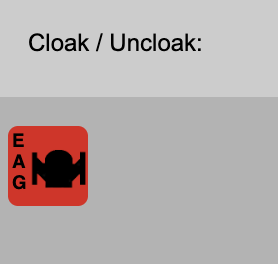
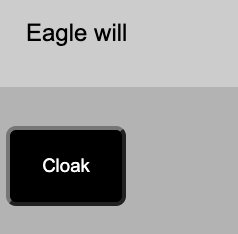
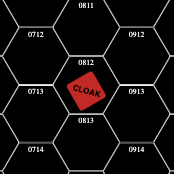
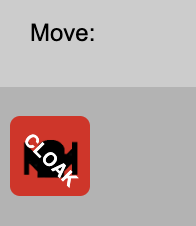 The option to cloak is now part of the Impluse Procedure. During the Cloak/Uncloak step, eligible ships will appear in the Control panel.
Clicking the ship icon in the panel will bring up the approriate Cloak or Uncloak button.
Both the counter icon on the map and the button icon in the Control panel will change to indicate the ship is cloaked.
The option to cloak is now part of the Impluse Procedure. During the Cloak/Uncloak step, eligible ships will appear in the Control panel.
Clicking the ship icon in the panel will bring up the approriate Cloak or Uncloak button.
Both the counter icon on the map and the button icon in the Control panel will change to indicate the ship is cloaked.
Tractor Beams
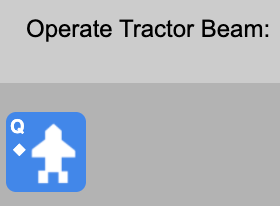
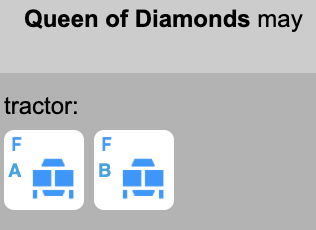
 Active ships will appear in the Control panel. Choose a ship by clicking its icon. Eligible targets (drones, shuttles,
freighters and the Planet Killer) within range will appear in the Control panel. Click the icon to tractor the target.
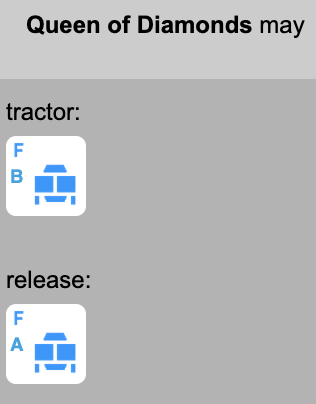
Tractored targets will now appear in the list of items that may be released.
Active ships will appear in the Control panel. Choose a ship by clicking its icon. Eligible targets (drones, shuttles,
freighters and the Planet Killer) within range will appear in the Control panel. Click the icon to tractor the target.
Tractored targets will now appear in the list of items that may be released.
In some cases, you need to adjust the tractoring ship's speed. Use the Adjust Units button to change a unit's speed.
No need to alter the tractored unit's speed. Tractored units will no longer move on their own.
Click Back to choose another target or operate a tractor from another ship.
Shields

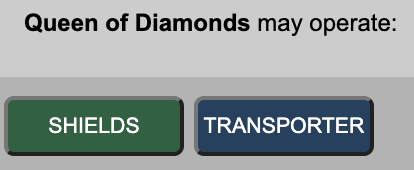
 Active ships will appear in the Control panel. Choose a ship by clicking its icon. Choose between activating Shields or Transporters.
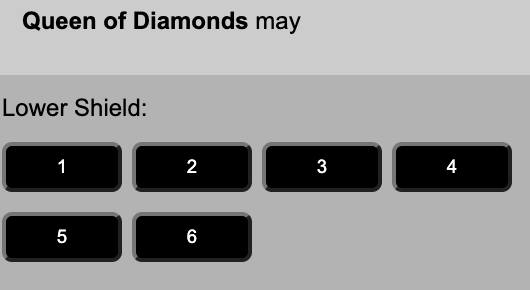
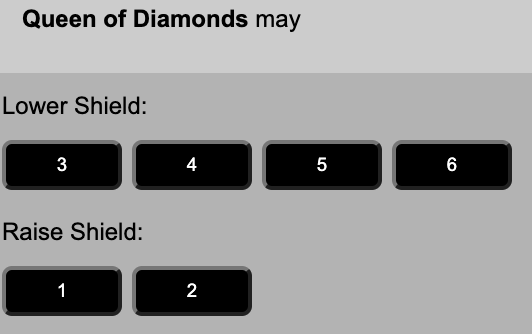
Clicking Shields will display the status of each shield. Click the shield number to change its status from Raised to Lowered or vice versa.
Shield status has no actual effect on the game. This is just a visual indicator if one chooses to use it during transporting and boarding actions.
Damage to shields is marked the SSD and not related to this action.
Click Back to return to Shields or Transporters choice.
Transporters
![]()
![]() Active ships will appear in the Control panel. Choose a ship by clicking its icon. Choose between activating Shields or Transporters.
Active ships will appear in the Control panel. Choose a ship by clicking its icon. Choose between activating Shields or Transporters.
Clicking Transporters will display valid targets (Freighters and the Planet Killer) within range.
Clicking a target will disply a choice of how many boarding parties to send that action.
Boarding Party Combat will be resolved later in the turn.
Click Back to return to Shields or Transporters choice.
Recover Shuttlecraft
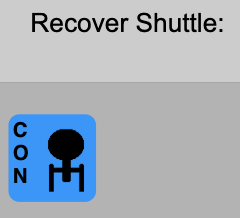
 Active ships will appear in the Control panel. Choose a ship by clicking its icon.
If a shuttlecraft is in range and the ship is not traveling too fast, the eligible shuttlecraft will appear in the Control panel.
Active ships will appear in the Control panel. Choose a ship by clicking its icon.
If a shuttlecraft is in range and the ship is not traveling too fast, the eligible shuttlecraft will appear in the Control panel.
Click the shuttlecraft icon to recover. A tractored shuttlecraft one hex away will be pulled (rotated) closer.
After recovery, you will be taken back to the initial step where you can choose a ship to recover shuttlecraft.
Launch Shuttlecraft (Admin)
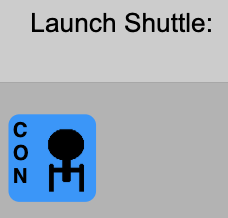
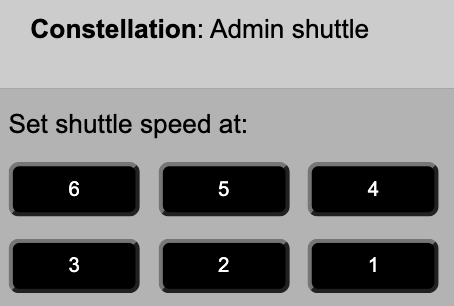
 Active ships capable of launching shuttles will appear in the Control panel. Choose a ship by clicking its icon.
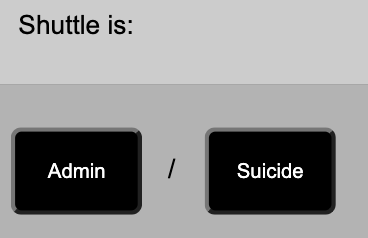
A choice to launch as an Admin or Suicide shuttle appears.
Active ships capable of launching shuttles will appear in the Control panel. Choose a ship by clicking its icon.
A choice to launch as an Admin or Suicide shuttle appears.
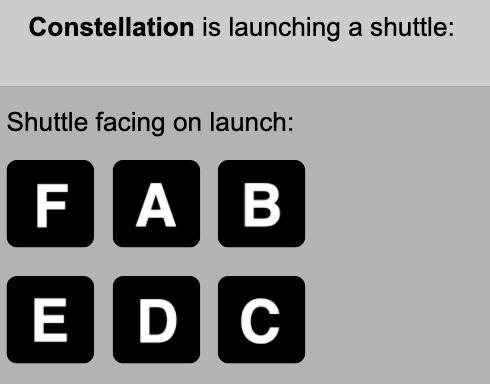
Clicking Admin will let you enter the speed and direction to point the shuttle on launch. Click Back at any step to abort.
After launch, you will be taken back to the initial step where you can choose to launch again or launch from another ship.
Launch Shuttlecraft (Suicide)
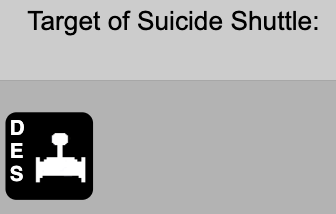
 Active ships capable of launching shuttles will appear in the Control panel. Choose a ship by clicking its icon.
A choice to launch as an Admin or Suicide shuttle appears.
Active ships capable of launching shuttles will appear in the Control panel. Choose a ship by clicking its icon.
A choice to launch as an Admin or Suicide shuttle appears.
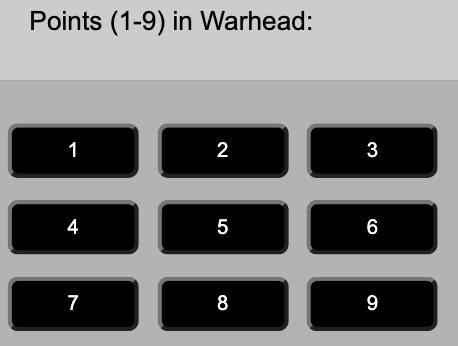
Clicking Suicide will bring up a set of eligible targets. Click a target icon and enter the warhead strength.
This is the points of energy you have put into the shuttle over three turns.
Next, you will enter the speed and direction to point the shuttle on launch. Click Back at any step to abort.
After launch, you will be taken back to the initial step where you can choose to launch again or launch from another ship.
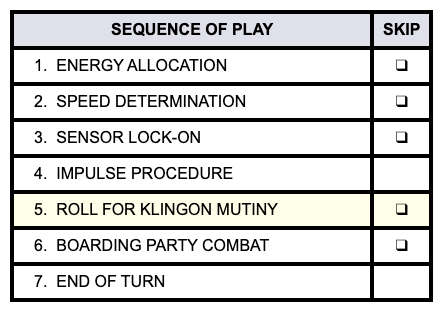
Sequence of Play
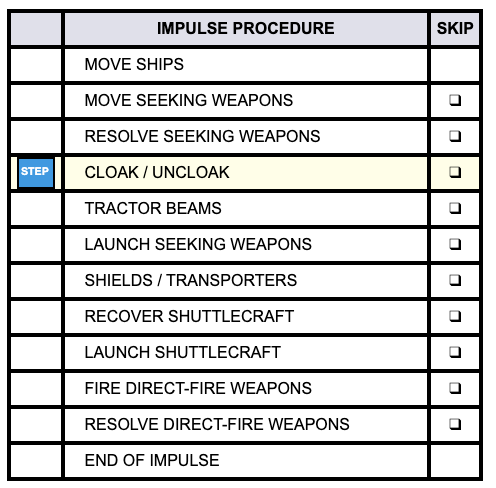
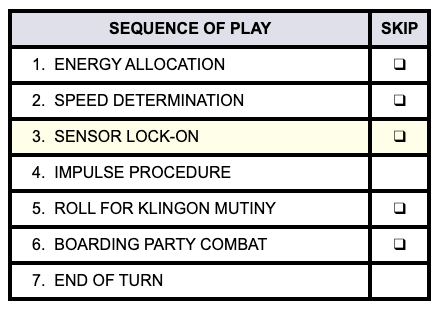
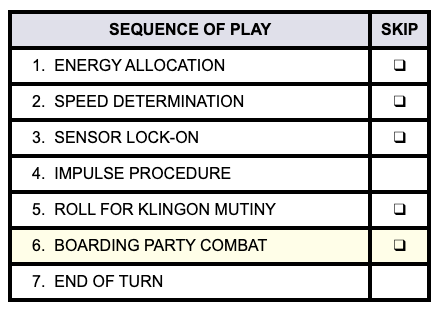
So many Steps...just Skip some
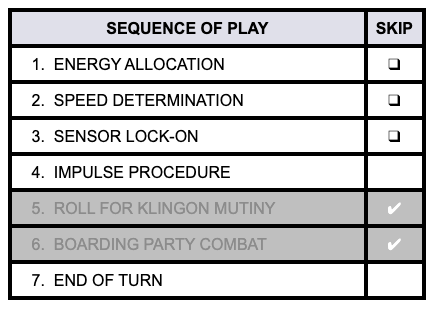
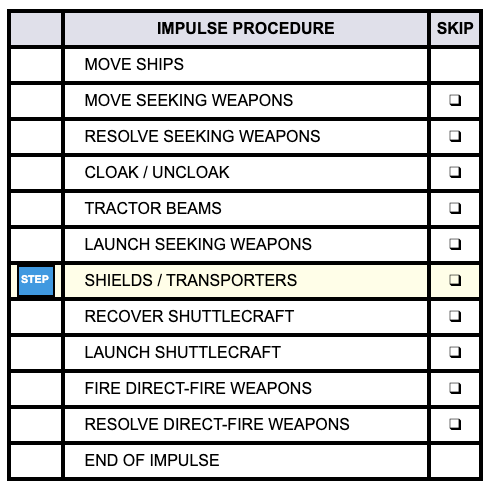
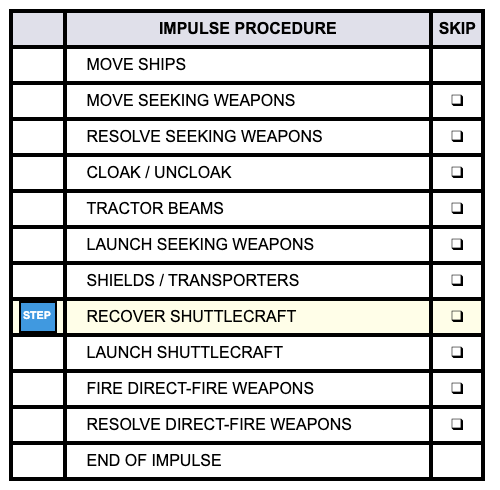
 Some steps in the Sequence of Play and the Impulse Procedure may be skiped in early scenarios where you haven't yet been introduced to them.
Replaying these scenarios later, you can choose to add these steps by unchecking the Skip box for them.
Some steps in the Sequence of Play and the Impulse Procedure may be skiped in early scenarios where you haven't yet been introduced to them.
Replaying these scenarios later, you can choose to add these steps by unchecking the Skip box for them.
You can choose to skip some steps yourself. Just click the Skip checkbox next the the steps you want to skip. A few impluses or turns later you can choose to uncheck it and make it part of the sequence again.
This is very useful during early impluses of the game where all you want to do is move closer to your target. You may choose to Skip several steps.
After you close the distance, you may want to consider these additional steps and the tactical advantages they provide and make them active again.
Energy Allocation
 Click the Player 1 Ship or Player 2 Ship button to access the corresponding Energy Allication Form.
Follow instructions provided in the Handbook for filling in each turn.
Click the Player 1 Ship or Player 2 Ship button to access the corresponding Energy Allication Form.
Follow instructions provided in the Handbook for filling in each turn.
Speed Determination

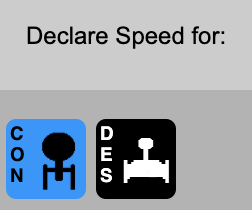
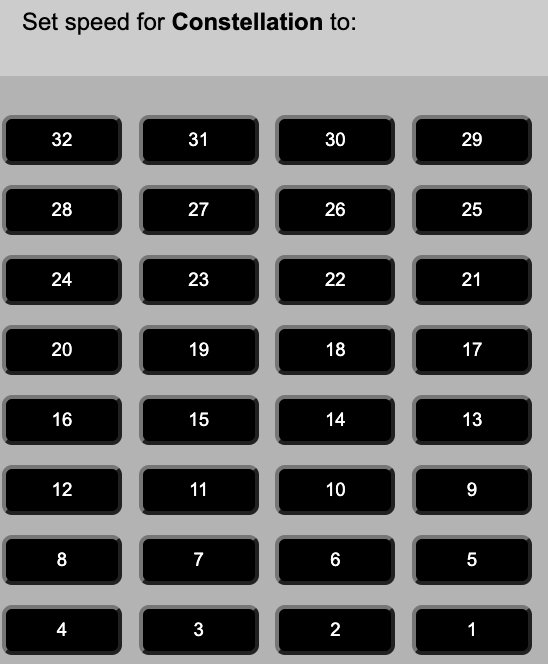 Active ships will appear in the Control panel. Click a ship icon to adjust its speed this turn.
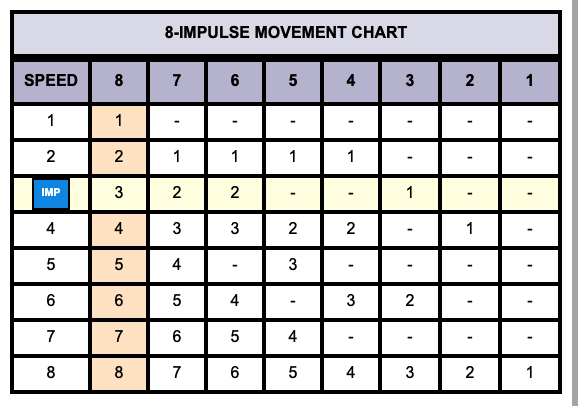
Available speeds are based on the impulse chart (8, 16, 32) being used for this scenario.
If you need to adjust a unit's speed during the turn (due to damage or tractor) use the Adjust Units button.
Sensor Lock-On

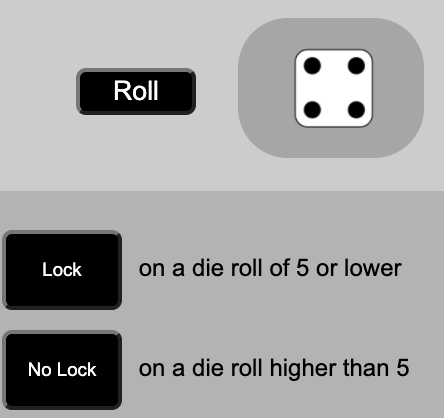 Active ships with Sensor damage (a rating below 6) will appear in the Control panel. Click a ship icon to roll for Sensor-Lock this turn.
Until a ship suffers Sensor damage, Lock-On is automatic. Once a ship's Sensor rating is below 6, the ship must roll for Lock-on every turn.
A die roller is provided for this. Evaluate the roll and mark as Lock or No Lock for this turn.
To lower a ship's Sensors after a hit is applied to the SSD, you will need to use the Adjust Units button to access the Sensor stat and adjust accordingly.
Klingon Mutiny

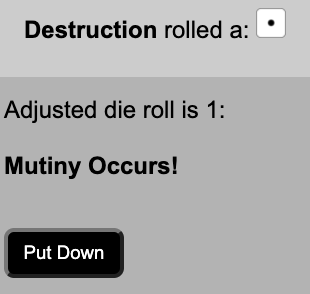
 Klingon ships that have lost their last Security Space due to damage will roll for possible mutiny each turn.
Ships under threat of mutiny appear in the Control panel. Click the ship icon to roll for possible mutiny.
Klingon ships that have lost their last Security Space due to damage will roll for possible mutiny each turn.
Ships under threat of mutiny appear in the Control panel. Click the ship icon to roll for possible mutiny.
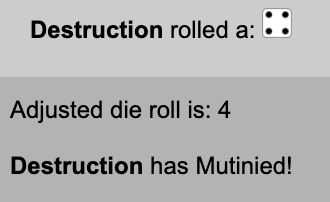
If a mutiny occurs, the ship must roll to put the mutiny down. The die roll determines whether the mutiny is successfull or fails, either way the ship will no longer roll for muntiny.
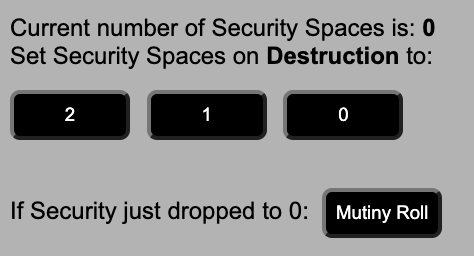
To reduce a ship's Security Spaces after a hit is applied to the SSD, you will need to use the Adjust Units button to access the Ctrl Space stat and adjust accordingly.
When Security Spaces is reduced to 0, a button for your first Mutiny Roll will appear as this happens immediately on loss of the last space.
Boarding Party Combat
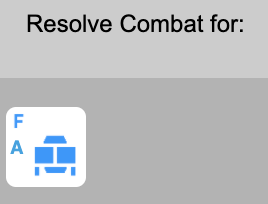
 Ships with enemy boarding parties on board appear in the Control panel. Click a ship icon to resolve Boarding Party Combat.
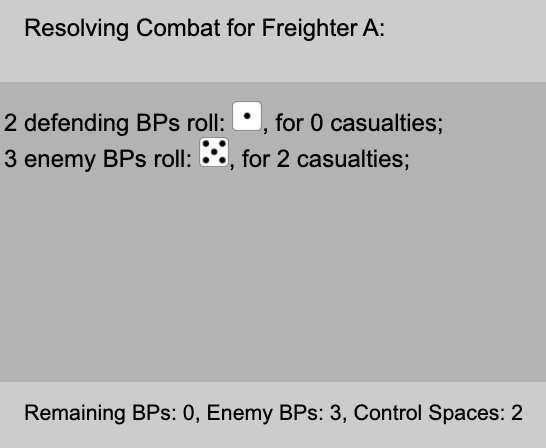
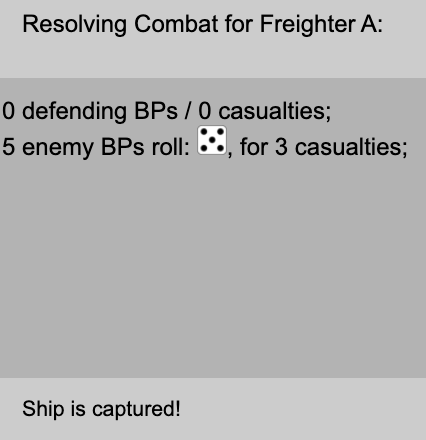
A die will be rolled for each side and casualties calculated. A brief report of remaining boarding parties and control spaces or if the ship was captured will be shown in the Message panel.
The ship will roll for Boarding Party Combat each turn until the enemy boarding parties are eliminated or the ship is captured.
If you need to adjust the number of boarding parties on board use the Adjust Units button to access the Own BPs or Enemy BPs stat and adjust accordingly.
Collect Monster Information
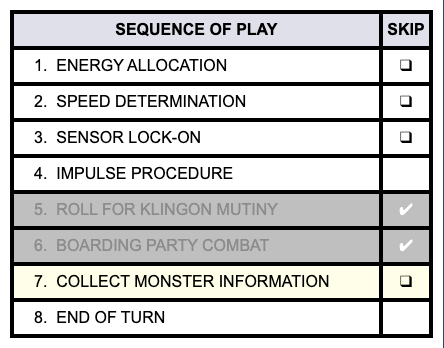
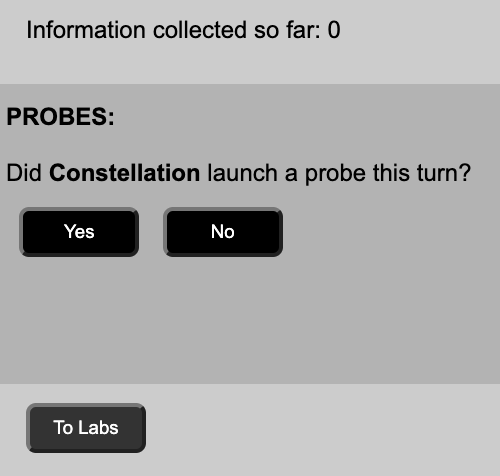
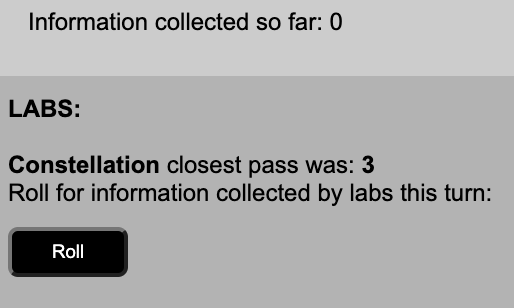
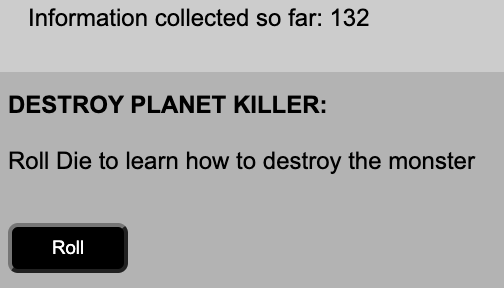
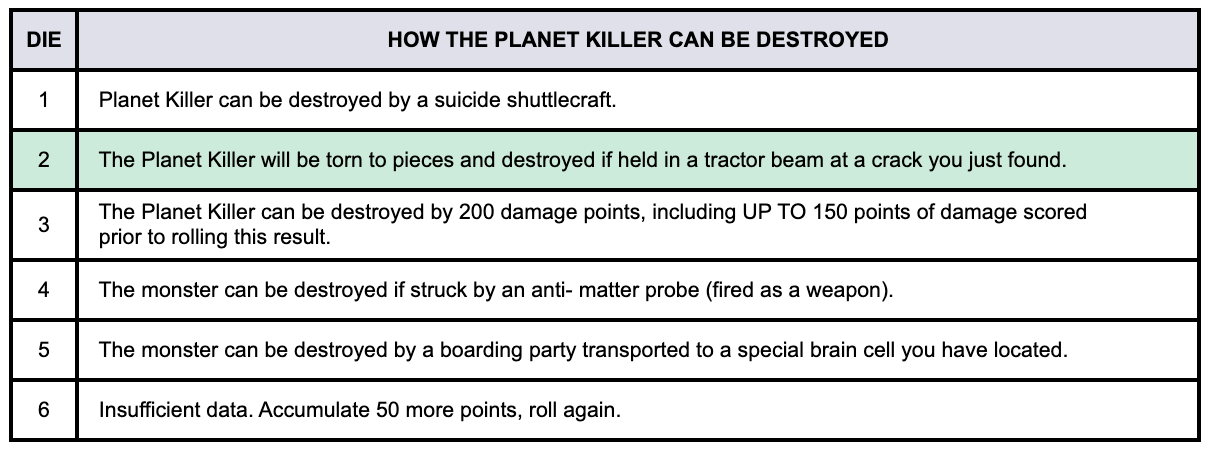
During scenario #11, information is collected on the Planet Killer in an attempt to find a weakness.
Indicate if you fired a probe at the monster this turn, then continue on to Labs.
A die roll and the ship's closest pass to the monster will determine the amount of information gathered.
When you have gathered enough information, your Science Team will report if they found a weakness.